Updating the firmware on your Atari 2600+ is a quick and easy process. Depending on your computer setup, you might have to proceed with an Admin password for portions of the installation process. Download the required files first and follow the instructions below.
Before You Begin
In order to update the firmware on the Atari 2600+ you will need to use a Windows 10/11 based PC. Download and unzip the four files linked below before you start. It is recommended that you create a folder on your PC to store all of the files needed in upgrading the firmware.
Required download:
The following zip file (2600+_firmware_update.zip) contains four separate files:
• Atari Dumper (AtariDumper1.1.0.2.exe) – Allows your computer to exchange files with the 2600+
• Driver Assistant (DriverAssitant_v5.12.zip) – Update to the latest driver that allows your compute to communicate with the 2600+. This must be unzipped before use.
• RKDev Tool (RKDevTool_Release_v2.74.zip) – A tool that allows your firmware on the Atari 2600+ to be updated. This must be unzipped before use.
• Update Image (update-1225.img) – This is the latest version of the emulator firmware you use with RKDev Tool to update the 2600+.
Click Here to Download Driver Update Files
Step 1 – Update the Dumper
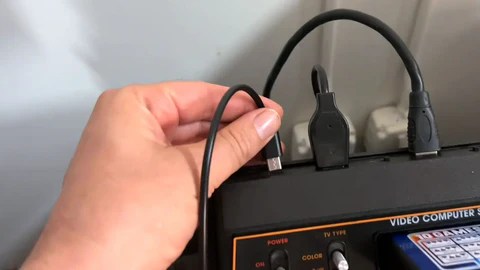
1. Turn off the power switch on the 2600+ and unplug the USB-C power cable from the power block. Now connect it to a powered USB port on your Windows-based PC or laptop. The Atari 2600+ will now be powered via the computer.
2. Set the TV TYPE switch to B-W
3. Hold down the GAME SELECT switch and flip the POWER switch on. Hold the GAME SELECT switch in the down position until your PC connects to the 2600+. You may hear a connection jingle or see a prompt letting you know the unit has connected successfully.
4. Locate and open the AtariDumper1.1.0.2.exe application you downloaded from the link above on your PC. If you successfully connected the 2600+ in the previous step, you should see the status as “Detected” in green at the bottom of the Atari Dumper window. If the status text appears red instead, re-attempt the connection process until a successful connection is made.
5. Press the Download button at the bottom of the Atari Dumper window. It will take a few seconds for the process to complete. When complete, the Dumper will update and the status indicator at the bottom of the app window should change to “Not Detected.” This concludes the first step of the process.
Step 2 – Update the Driver
The 2600+ needs to update a driver on your PC so it can communicate with the 2600+. This process only needs to occur once.
1. Flip the POWER switch to the OFF position and reconnect the USB-C cable to the back of the console.
2. Switch the TV TYPE switch to COLOR.
3. Hold down GAME RESET and turn the power switch to the ON position. Keep holding down GAME RESET until your PC connects to the 2600+. You may hear a connection jingle or see a prompt letting you know you have connected successfully.
4. Open the device manager on your PC and locate the Unknown Device.
5. Find the driver assistant you downloaded on your PC and double click to launch. The device file name is DriverAssitant_v5.12.exe. You may need to unzip the DriverAssitant_v5.12.zip archive file to access the nested folders if you haven’t done so already.
6. After a short time a confirmation message should appear notifying you the driver has been updated successfully. The Undetected Device should now have the name Rockusb Device. This marks the end of step 2.
Step 3 – Updating the Emulator
The final step of the update process will update the firmware on the emulator itself.
1. Turn the POWER switch to the OFF position and reconnect the USB-C cable to the back of the console.
2. Switch the TV TYPE switch to COLOR.
3. Hold down GAME RESET and turn the power switch to the ON position. Keep holding down GAME RESET until your PC connects to the 2600+. You may hear a connection jingle or see a prompt letting you know you have connected successfully.
4.Find the RKDevTool you downloaded on your PC and double click to launch. The device file name is RKDevTool.exe. You may need to unzip the RKDevTool_Release_v2.74.zip archive file to access the nested folders if you haven’t done so already.
When the application opens you should see the status message ‘Found one MASKROM device’.
5. Select the tab “Upgrade Firmware” and press the “Firmware” button. This will open a window that allows you to navigate to the update driver file you downloaded. This file should be named update-1225.img.
6. Click the named update-1225.img and then press the Open button to open the img file.
7. The firmware box should now show the path to the file you have selected. This file path might look something D:AtariUpgradupdate-1225.img. Press the Upgrade button and you should see a rolling set of updates in the status window on the right. When this process is complete, your 2600+ has been successfully updated.
Compatibility List – LINK GOES HERE
Video Walkthrough
If a video walkthrough is more helpful, our friends over at GenXGrownUp have put together their own guide to the process of updating the firmware.
[embedded content]
The post Updating Atari 2600+ Firmware appeared first on Old School Gamer Magazine.


