
There are so many options out there to upscale your retro game consoles in order to make them look better on modern TVs. You can use something like a Framemeister, RetroTink or OSSC, for instance, and the results can be stunning.
The thing that all of these upscalers have in common, however, is that they’re aimed at consoles that don’t already have HDMI video output.
This leaves a bit of a gap in the market considering that systems like the PS3, Xbox 360 and even the Nintendo Switch are starting to show their age and could benefit from the same type of upscaling we’re seeing with those retro systems.
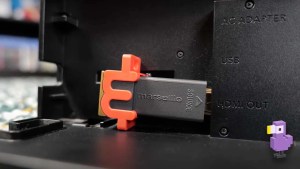
This is where the mClassic HDMI upscaler comes in, created by a company called Marseille and kindly sent to us for the purposes of this review. This is an upscaler which converts a HDMI signal and (at least according to the box) adds a depth of field effect, anti-aliasing, and sharpens the image.
And of course, it upscales the resolution of whatever console you’re using.
On top of all of this, it adds no noticeable lag, which in theory makes it the ultimate device for improving your experience with these slightly older systems.
You’re getting all of this in a tiny almost USB sized device which costs approximately £100 in the UK or $100 in the US. This might seem a little bit expensive, but if it improves the quality of your consoles as much as it makes out on the box, then this could be a game changer.
PROS
Sub 1080p Games Have More Clarity & Color
Simple Setup Process
CONS
Results Can Vary
Inconsistent Quality With Retro Consoles
4K Technical Limitations
The mClassic plugs straight into the HDMI port of whatever console you’re using, then allows you to plug a standard HDMI cable into the other end in order to send the video to your display.
It does need to be powered by a micro USB cable (which is included with the product) but after setting everything up, it just works! There’s no tinkering with menus or complex settings to navigate, it’s all pretty straight forward.
One minor thing to look out for is that because the device is quite wide, you can’t plug it into the Switch dock directly because the plastic shell makes it slightly too wide to fit comfortably. Luckily the mClassic HDMI upscaler comes with this little HDMI extension which I assume has been provided for this exact purpose, so this isn’t an issue at all.
The Three Upscaling Settings
The only other thing you might want to mess around with is the switch on the side of the device which has three different positions.
The first option is simply deactivating the upscaler completely and using it as a passthrough, effectively using your console’s video output as it was intended with none of the features of the mClassic.
The second option turns on a green light and this is called the ‘Processing On’ mode. This is basically the default setting you’re going to want to use in most cases, with it turning on the upscaling and additional features to improve the image coming from your console.
Then the third and final option is the ‘Retro Mode’, turning on a blue light on the device and as far as I can tell this is exactly the same as the ‘Processing On’ mode but forces the image to be a 4:3 aspect ratio. That’s pretty handy if you’re using this with a retro console and your TV doesn’t have the option to natively display 4:3.
That’s pretty much all there is to it; it’s an extremely simple setup process and, once it’s plugged in, turned on and in its default processing mode, you theoretically wouldn’t need to touch it ever again.
But let’s get into the reason you’re all here. You’re hungry for some footage comparisons aren’t you? Well then, let’s dive in to some gameplay!
mClassic Gameplay Footage Comparisons
On the mClassic website, the vast majority of the footage comparisons they use are coming from some of the best Nintendo Switch games, which makes me assume that this has been made with that particular system as its primary focus.
For that reason, I think it makes sense to start there and show you some comparisons between the mClassic footage and some raw unaltered footage, all being recorded by an AVerMedia Live Gamer 4K capture card and through OBS Studio as the capture software.
To begin with I’m keeping things simple and setting the Switch to output at 1080p which is it’s maximum resolution.
Let’s look at some side by side footage of Super Mario Odyssey because I think that showcases the difference a lot better. So on the left we have the Nintendo Switch video in it’s raw form and on the right is the mClassic footage.
Mario looks a lot sharper on the right whereas on the left he almost looks slightly out of focus. The colours appear to be slightly more vibrant from the mClassic too, and if we zoom in a little bit, we can pick up on even more minor differences. The anti-aliasing effect of the mClassic is clearly making things look less jagged.
Moving over to some gameplay with more motion and you can still see a huge difference. It’s like there’s more contrast and saturation from the mClassic and the sharper image allows you to pick up on more detail in the environment.
ARTICLE PROVIDED BY https://retrododo.com/
The post mClassic HDMI Upscaler Review – Does It “Upgrade” Your Switch? appeared first on Old School Gamer Magazine.